Tuesday, December 22, 2009

Holiday Cookie Shout Outs

I've been making my way through cookie baking the last few days. Usually I'm impatient about the whole thing, but I decided to take my time this year and it's comforting. I have about four different kinds of cookie dough chilling in the fridge and I'll get to it when I do.

I've made peppermint bark cookies, lemon raspberry thumbprints, lime meltaways, chocolate chip rugalach with ganache. I'm going to bake sugar cookies, lemon stars, and more of the above. I'm excited about the sugar cookie decorating since I've been reading on techniques off and on all year. Hopefully they will turn out stupidly pretty, although I've not been very good with it in the past. WE SHALL SEE.

Pretty Light
Lemon Raspberry Thumbprints

Lime Meltaways
Lime Meltaways

Chocolate Chip Rugalach
Chocolate Chip Rugalach (I just made and used ganache for the filling).

Peppermint Bark Cookies
And Peppermint Bark Cookies (I would NOT bake that dough longer than 15-20 minutes).

Alice
And a kitty!

Sunday, June 7, 2009

Cake AND Cookies = WIN!

I wanted something special for the teachers at the end of school this year. Cupcakes are awesome and more-than-awesome.. but what if it was a cupcake with a cookie on TOP?

EXCELLENCE!

And they came out so cute.

Cookie on a Cupcake

The final result was chocolate cake with vanilla frosting. The cookies were almond cookies with Alton Brown's "not" royal icing. I can't find the link though! So here it is.. I love this frosting, but you should definitely let it sit around for a little while before you use it. It's pretty slippery. We painted our cookies with a brush.

1 cup confectioners' sugar
2 teaspoons milk
2 teaspoons light corn syrup
1/4 teaspoon almond extract
assorted food coloring

DIRECTIONS

In a small bowl, stir together confectioners' sugar and milk until smooth. Beat in corn syrup and almond extract until icing is smooth and glossy. If icing is too thick, add more corn syrup. Divide into separate bowls, and add food colorings to each to desired intensity. Dip cookies, or paint them with a brush.

Friday, June 5, 2009

Cocoa Syrup and Alton Brown

Alton Brown is my new food hero. I wish I knew as much about food chemistry as he did. But unless Alton is talking, I have a feeling I would just glaze over and tune out.

But not only is he fascinating in a "Bill Nye" sort of way, he really knows what he's talking about. His cinnamon rolls are amazing and the whole house loves his cocoa syrup. Half of that cocoa syrup recipe makes two jelly jars' worth and is SO GOOD.


Alton Brown's Cocoa Syrup
Care of the Food Network

(I half this recipe, personally.)

1 1/2 cups water
3 cups sugar
1 1/2 cups Dutch-processed cocoa
1 tablespoon vanilla extract
1/4 teaspoon kosher salt
2 tablespoons light corn syrup

Bring water and sugar to a boil and whisk in cocoa, vanilla, salt, and corn syrup. Whisk until all of the solids have dissolved. Reduce sauce until slightly thickened. Strain and cool to room temperature.

I pour it into jelly jars that I have around the house to cool off and store it in the fridge. It's good stuff!

Sunday, April 12, 2009

Make Your Own Vanilla Extract

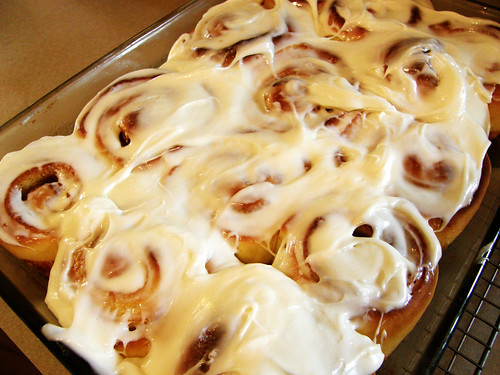
Ever since I started baking about a year and a half ago, I've noticed that the most expensive ingredient I've burned through is vanilla. I just accepted this as it was, finding different varieties that I liked.

Then I noticed an article on how to make your OWN vanilla extract. I was intrigued in the way that I am when I hear someone raises their own chickens. "Oh that would be neat, but I couldn't do it..."

Vanilla Beans

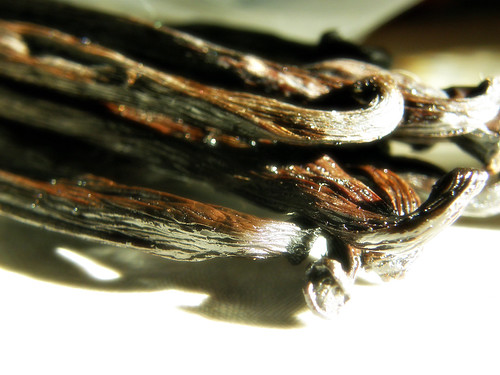
After seeing more articles referring to same thing, I decided to try it. I had no idea what a vanilla bean WAS, let alone how to buy them successfully. In the few glimpses I'd had of vanilla beans, they were hideously expensive ($15 for 2 beans!).

On a whim in February, I checked the internet for vanilla beans and found that I could have 20 beans for $10.50. I bought some, received them a few days later and broke out an old jelly jar.

Here's how you do it:


You need about 6-8 vanilla beans to start with.
An old, clean jar.
And about 1.5 cups of alcohol. I used cheap vodka.

Pour the vodka (or whatever alcohol, I hear rum is good too) into the clean jar. Slice open your vanilla beans. I also found later that it helped to cut them in half, so they were always under the liquid instead of poking out. Put the beans in the jar. Put the top on.

Put it away in the cupboard and every day or two, shake the jar.

I also saw in another article that they recommended that you buy 1-2 jars of vanilla extract because you will be using them while your extract brews. Quite true. I've also seen recommendations that you pour some already prepared extract into the new jar. I don't see why you should do that.. but I suppose you could.

It takes about two months for your homemade extract to brew. Any time before that, you are just making vanilla flavored vodka (or alcohol). And while that is very nice, it's not what you want for baking.

In two months, check your extract. It should smell and taste better than what you are already using for baking. When mine was ready, I poured some into an old vanilla jar I saved. I dropped half a bean in that jar too, just for fun.

Re-top off the larger extract jar with your alcohol and put it back in the cupboard. Next time you need some, it will be there. Every time you fill your little bottle up, top the larger jar off. The beans will last for a long time.. and you have an unlimited supply of vanilla!

Also, every time you use a vanilla bean in a recipe, put the leftover bean husk in the jar! (If it was in something, make sure you rinse it off first.) You never have a reason to throw a bean husk away. (Are they even called husks? They look like one.) Don't forget to shake it!

I also threw a bean and some sugar into a Ziploc bag and made vanilla sugar, which some recipes call for and just tastes amazing on morning toast.

Now just to get around to getting those chickens...

Two Things.. Ok. Three things.


First of all, we cranked up the new Cuisinart Ice Cream maker that my mother sent us for Easter.

And like all things, I chose to make the first batch the "hard way," as in making it full fat with egg yolks. When do this, you need to cook the mixture. Which results in you needing to cool the mixture back down. A bit of a timing let down, but definitely higher quality ice cream.

In all, the ice cream turned out awesome. We are very happy to have the new ice cream maker. Since last night, I've realized there were much easier ways to make ice cream in the new Cuisinart.. so we made another less fat, no egg yolk ice cream. Which is also very very good and accepted by the children. We'll stick with that one for quick turn-arounds.

*******

Secondly, this weekend was super baking weekend. I made german chocolate cupcakes for an order, a three layer carrot cake, and last but certainly not least - Cinnamon Rolls.

I HIGHLY HIGHLY recommend Alton Brown's Overnight Cinnamon Roll recipe. Yes, it's a time investment. But like the egg yolk ice cream, so much more worth your time. Just be prepared to work on them for a while, but your family will love you (more). Lots.

Carrot Layer Cake
I am definitely not a cake decorator.

Frosted Cinnamon Rolls of Doom
Amazing.

Innards
Cake "Innards". So very yummy.

Sunday, March 29, 2009

Buffalo Chicken Pizza


Buffalo Chicken Pizza is a new favorite in the house and OH SO easy to make.

Ingredients:

pizza crust (we usually cheat with a crust from Trader Joe's. I have yet to find one I like to make.)
Chicken tenderloins cut into small pieces (2-3 total)
1/2 cup of Frank's Hot Sauce
1/2-3/4 cup of Ranch dressing
onions
mozzarella cheese

Preheat oven to 400*.

optional: Cook the chicken in a bit of butter, but you can definitely leave that out if you like.

Lay the pizza crust on an oiled pan. We have been using cookie sheets which makes an easy to cut rectangle pizza.

Cover the raw chicken in hot sauce and place in a heated pan. Cook until done. Once the chicken is cooked fully through, let it rest on the side for a minute while you do the following...

Cover the pizza crust in about a 1/2 cup of ranch dressing. You can go light dressing on this if you like. If you like lots of dressing, go heavier. It's up to your preference.

Lay the chicken pieces and raw onions (or you can brown them a little which is also YUM) over the pizza evenly. Cover in your desired amount of mozzarella cheese.

Cook the pizza for about 10 minutes in a hot oven. Once the top is browned, it's done!

Cut and eat!

Saturday, March 14, 2009

Brownies and Ice Cream

First of all, I would like to say that this is something I would *love* to own:


It's the Cuisinart Ice Cream Maker.. oooh.


I see awesome homemade ice cream recipes all the time and it's pretty hard to make WITHOUT an ice cream maker.

Secondly, I would like to share with you the BEST brownie recipe in the WORLD. Every time I make these, I get tons of compliments.

Supernatural Brownies (from Buffchickpea.com)

2 sticks unsalted butter, each cut into thirds
8 ounces bittersweet or semisweet chocolate (I actually just used chocolate chips, works great!)
4 large eggs
1/2 teaspoon salt
1 cup granulated sugar
1 cup firmly packed brown sugar (recipe calls for dark, I used light and it was fine)
2 teaspoons vanilla extract
1 cup all-purpose flour

One 13x9x2-inch pan, buttered (I have used butter and nonstick spray, both work).

Preheat oven to 350 degrees.

Put butter and chocolate in a heavy saucepan on medium-low and melt. Stir occasionally as they melt. (This can also be done in a microwave, but I personally hate doing it that way.)

Whisk eggs together in a large bowl, then whisk in the salt, sugars, and vanilla. Stir in the chocolate and butter mixture, then fold in the flour.
*Note: I did this by hand. It's not necessary to do in your mixer and it might overmix the brownies.*

Pour batter into prepared pan and spread evenly. Bake for about 45 minutes, until top has formed a shiny crust.

In my oven, this takes 30 minutes. I made these in 9x9 pans (two of them) the other day and baked them for 20 minutes. They came out fantastically fudgey-cakey. Probably in a non-crappy oven, this would be achieved at 30 minutes. But once your crust is cracked and set, it's time to take them out. Don't overbake!