Tuesday, December 22, 2009

Holiday Cookie Shout Outs

I've been making my way through cookie baking the last few days. Usually I'm impatient about the whole thing, but I decided to take my time this year and it's comforting. I have about four different kinds of cookie dough chilling in the fridge and I'll get to it when I do.

I've made peppermint bark cookies, lemon raspberry thumbprints, lime meltaways, chocolate chip rugalach with ganache. I'm going to bake sugar cookies, lemon stars, and more of the above. I'm excited about the sugar cookie decorating since I've been reading on techniques off and on all year. Hopefully they will turn out stupidly pretty, although I've not been very good with it in the past. WE SHALL SEE.

Pretty Light
Lemon Raspberry Thumbprints

Lime Meltaways
Lime Meltaways

Chocolate Chip Rugalach
Chocolate Chip Rugalach (I just made and used ganache for the filling).

Peppermint Bark Cookies
And Peppermint Bark Cookies (I would NOT bake that dough longer than 15-20 minutes).

Alice
And a kitty!

Sunday, June 7, 2009

Cake AND Cookies = WIN!

I wanted something special for the teachers at the end of school this year. Cupcakes are awesome and more-than-awesome.. but what if it was a cupcake with a cookie on TOP?

EXCELLENCE!

And they came out so cute.

Cookie on a Cupcake

The final result was chocolate cake with vanilla frosting. The cookies were almond cookies with Alton Brown's "not" royal icing. I can't find the link though! So here it is.. I love this frosting, but you should definitely let it sit around for a little while before you use it. It's pretty slippery. We painted our cookies with a brush.

1 cup confectioners' sugar
2 teaspoons milk
2 teaspoons light corn syrup
1/4 teaspoon almond extract
assorted food coloring

DIRECTIONS

In a small bowl, stir together confectioners' sugar and milk until smooth. Beat in corn syrup and almond extract until icing is smooth and glossy. If icing is too thick, add more corn syrup. Divide into separate bowls, and add food colorings to each to desired intensity. Dip cookies, or paint them with a brush.

Friday, June 5, 2009

Cocoa Syrup and Alton Brown

Alton Brown is my new food hero. I wish I knew as much about food chemistry as he did. But unless Alton is talking, I have a feeling I would just glaze over and tune out.

But not only is he fascinating in a "Bill Nye" sort of way, he really knows what he's talking about. His cinnamon rolls are amazing and the whole house loves his cocoa syrup. Half of that cocoa syrup recipe makes two jelly jars' worth and is SO GOOD.


Alton Brown's Cocoa Syrup
Care of the Food Network

(I half this recipe, personally.)

1 1/2 cups water
3 cups sugar
1 1/2 cups Dutch-processed cocoa
1 tablespoon vanilla extract
1/4 teaspoon kosher salt
2 tablespoons light corn syrup

Bring water and sugar to a boil and whisk in cocoa, vanilla, salt, and corn syrup. Whisk until all of the solids have dissolved. Reduce sauce until slightly thickened. Strain and cool to room temperature.

I pour it into jelly jars that I have around the house to cool off and store it in the fridge. It's good stuff!

Sunday, April 12, 2009

Make Your Own Vanilla Extract

Ever since I started baking about a year and a half ago, I've noticed that the most expensive ingredient I've burned through is vanilla. I just accepted this as it was, finding different varieties that I liked.

Then I noticed an article on how to make your OWN vanilla extract. I was intrigued in the way that I am when I hear someone raises their own chickens. "Oh that would be neat, but I couldn't do it..."

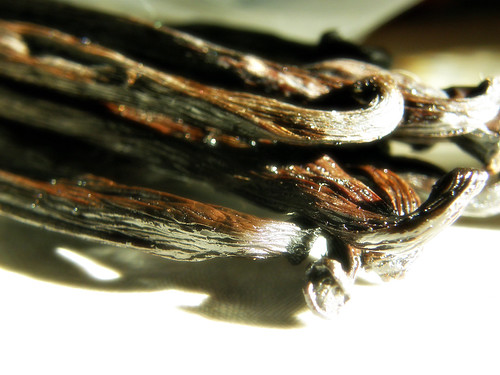
Vanilla Beans

After seeing more articles referring to same thing, I decided to try it. I had no idea what a vanilla bean WAS, let alone how to buy them successfully. In the few glimpses I'd had of vanilla beans, they were hideously expensive ($15 for 2 beans!).

On a whim in February, I checked the internet for vanilla beans and found that I could have 20 beans for $10.50. I bought some, received them a few days later and broke out an old jelly jar.

Here's how you do it:


You need about 6-8 vanilla beans to start with.
An old, clean jar.
And about 1.5 cups of alcohol. I used cheap vodka.

Pour the vodka (or whatever alcohol, I hear rum is good too) into the clean jar. Slice open your vanilla beans. I also found later that it helped to cut them in half, so they were always under the liquid instead of poking out. Put the beans in the jar. Put the top on.

Put it away in the cupboard and every day or two, shake the jar.

I also saw in another article that they recommended that you buy 1-2 jars of vanilla extract because you will be using them while your extract brews. Quite true. I've also seen recommendations that you pour some already prepared extract into the new jar. I don't see why you should do that.. but I suppose you could.

It takes about two months for your homemade extract to brew. Any time before that, you are just making vanilla flavored vodka (or alcohol). And while that is very nice, it's not what you want for baking.

In two months, check your extract. It should smell and taste better than what you are already using for baking. When mine was ready, I poured some into an old vanilla jar I saved. I dropped half a bean in that jar too, just for fun.

Re-top off the larger extract jar with your alcohol and put it back in the cupboard. Next time you need some, it will be there. Every time you fill your little bottle up, top the larger jar off. The beans will last for a long time.. and you have an unlimited supply of vanilla!

Also, every time you use a vanilla bean in a recipe, put the leftover bean husk in the jar! (If it was in something, make sure you rinse it off first.) You never have a reason to throw a bean husk away. (Are they even called husks? They look like one.) Don't forget to shake it!

I also threw a bean and some sugar into a Ziploc bag and made vanilla sugar, which some recipes call for and just tastes amazing on morning toast.

Now just to get around to getting those chickens...

Two Things.. Ok. Three things.


First of all, we cranked up the new Cuisinart Ice Cream maker that my mother sent us for Easter.

And like all things, I chose to make the first batch the "hard way," as in making it full fat with egg yolks. When do this, you need to cook the mixture. Which results in you needing to cool the mixture back down. A bit of a timing let down, but definitely higher quality ice cream.

In all, the ice cream turned out awesome. We are very happy to have the new ice cream maker. Since last night, I've realized there were much easier ways to make ice cream in the new Cuisinart.. so we made another less fat, no egg yolk ice cream. Which is also very very good and accepted by the children. We'll stick with that one for quick turn-arounds.

*******

Secondly, this weekend was super baking weekend. I made german chocolate cupcakes for an order, a three layer carrot cake, and last but certainly not least - Cinnamon Rolls.

I HIGHLY HIGHLY recommend Alton Brown's Overnight Cinnamon Roll recipe. Yes, it's a time investment. But like the egg yolk ice cream, so much more worth your time. Just be prepared to work on them for a while, but your family will love you (more). Lots.

Carrot Layer Cake
I am definitely not a cake decorator.

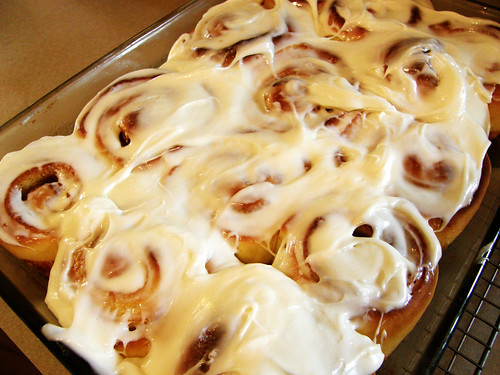
Frosted Cinnamon Rolls of Doom
Amazing.

Innards
Cake "Innards". So very yummy.

Sunday, March 29, 2009

Buffalo Chicken Pizza


Buffalo Chicken Pizza is a new favorite in the house and OH SO easy to make.

Ingredients:

pizza crust (we usually cheat with a crust from Trader Joe's. I have yet to find one I like to make.)
Chicken tenderloins cut into small pieces (2-3 total)
1/2 cup of Frank's Hot Sauce
1/2-3/4 cup of Ranch dressing
onions
mozzarella cheese

Preheat oven to 400*.

optional: Cook the chicken in a bit of butter, but you can definitely leave that out if you like.

Lay the pizza crust on an oiled pan. We have been using cookie sheets which makes an easy to cut rectangle pizza.

Cover the raw chicken in hot sauce and place in a heated pan. Cook until done. Once the chicken is cooked fully through, let it rest on the side for a minute while you do the following...

Cover the pizza crust in about a 1/2 cup of ranch dressing. You can go light dressing on this if you like. If you like lots of dressing, go heavier. It's up to your preference.

Lay the chicken pieces and raw onions (or you can brown them a little which is also YUM) over the pizza evenly. Cover in your desired amount of mozzarella cheese.

Cook the pizza for about 10 minutes in a hot oven. Once the top is browned, it's done!

Cut and eat!

Saturday, March 14, 2009

Brownies and Ice Cream

First of all, I would like to say that this is something I would *love* to own:


It's the Cuisinart Ice Cream Maker.. oooh.


I see awesome homemade ice cream recipes all the time and it's pretty hard to make WITHOUT an ice cream maker.

Secondly, I would like to share with you the BEST brownie recipe in the WORLD. Every time I make these, I get tons of compliments.

Supernatural Brownies (from Buffchickpea.com)

2 sticks unsalted butter, each cut into thirds
8 ounces bittersweet or semisweet chocolate (I actually just used chocolate chips, works great!)
4 large eggs
1/2 teaspoon salt
1 cup granulated sugar
1 cup firmly packed brown sugar (recipe calls for dark, I used light and it was fine)
2 teaspoons vanilla extract
1 cup all-purpose flour

One 13x9x2-inch pan, buttered (I have used butter and nonstick spray, both work).

Preheat oven to 350 degrees.

Put butter and chocolate in a heavy saucepan on medium-low and melt. Stir occasionally as they melt. (This can also be done in a microwave, but I personally hate doing it that way.)

Whisk eggs together in a large bowl, then whisk in the salt, sugars, and vanilla. Stir in the chocolate and butter mixture, then fold in the flour.
*Note: I did this by hand. It's not necessary to do in your mixer and it might overmix the brownies.*

Pour batter into prepared pan and spread evenly. Bake for about 45 minutes, until top has formed a shiny crust.

In my oven, this takes 30 minutes. I made these in 9x9 pans (two of them) the other day and baked them for 20 minutes. They came out fantastically fudgey-cakey. Probably in a non-crappy oven, this would be achieved at 30 minutes. But once your crust is cracked and set, it's time to take them out. Don't overbake!

Saturday, February 28, 2009

Daring Bakers - February 2009 Challenge: Flourless Chocolate Cake

Daring Baker's Challenge:

The February 2009 challenge is hosted by Wendy of WMPE's blog and Dharm of Dad ~ Baker & Chef.We have chosen a Chocolate Valentino cake by Chef Wan; a Vanilla Ice Cream recipe from Dharm and a Vanilla Ice Cream recipe from Wendy as the challenge.

I missed January's challenge deadline, so I was intent on getting this one done.

The cake was amazing. I baked it in a springform pan and then cut small hearts out with a cookie cutter. It would have helped if the cookie cutter was deeper, but it still turned out great.

I'd never made ice cream before even in an ice cream maker, so this was really interesting. I loved how it came out. It was REALLY rich and really good. Now I want the Cuisinart ice cream maker REAL BAD.

Also, getting my hands on some vanilla beans was the best thing I've ever done. They made the ice cream SUPER yummy. You get find them online so much cheaper than you can in the grocery store.

Now that I've done it, I wish I had altered the recipe a little. I just wanted to see how it came out. I'm sure I will next time. I'm actually hoping the March challenge is a little HARDER... this was pretty easy to be honest.
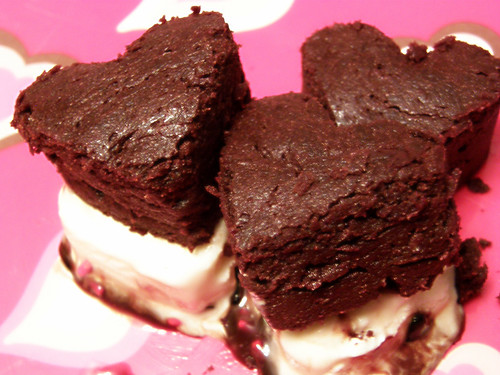
Happy Valentines Day (Cakes)!


Chocolate Valentino

Preparation Time: 20 minutes
16 ounces (1 pound) of semisweet chocolate, roughly chopped
½ cup (1 stick) plus 2 tablespoons of unsalted butter
5 large eggs separated

1. Put chocolate and butter in a heatproof bowl and set over a pan of simmering water (the bottom of the bowl should not touch the water) and melt, stirring often.

2. While your chocolate butter mixture is cooling. Butter your pan and line with a parchment circle then butter the parchment.

3. Separate the egg yolks from the egg whites and put into two medium/large bowls.

4. Whip the egg whites in a medium/large grease free bowl until stiff peaks are formed (do not over-whip or the cake will be dry).

5. With the same beater beat the egg yolks together.

6. Add the egg yolks to the cooled chocolate.

7. Fold in 1/3 of the egg whites into the chocolate mixture and follow with remaining 2/3rds. Fold until no white remains without deflating the batter. {link of folding demonstration}

8. Pour batter into prepared pan, the batter should fill the pan 3/4 of the way full, and bake at 375F

9. Bake for 25 minutes until an instant read thermometer reads 140F/60C.
Note – If you do not have an instant read thermometer, the top of the cake will look similar to a brownie and a cake tester will appear wet.
10. Cool cake on a rack for 10 minutes then unmold.

Dharm's Ice Cream Recipe
Classic Vanilla Ice Cream

Preparation Time: 30 minutes

Recipe comes from the Ice Cream Book by Joanna Farrow and Sara Lewis (tested modifications and notes in parentheses by Dharm)


Ingredients
1 Vanilla Pod
1 ¼ cups Semi Skimmed Milk – in the U.S. this is 2% fat (or use fresh full fat milk that is pasteurised and homogenised {as opposed to canned or powdered}). Dharm used whole milk.
4 large egg yolks
6 tbsp caster sugar {superfine sugar can be achieved in a food processor or use regular granulated sugar}
1 tsp corn flour {cornstarch}
1 ¼ cups Double Cream (48% butter fat) {in the U.S. heavy cream is 37% fat)
{you can easily increase your cream's fat content by heating 1/4 cup of heavy cream with 3 Tbs of butter until melted - cool to room temperature and add to the heavy cream as soon as whisk marks appear in the cream, in a slow steady stream, with the mixer on low speed. Raise speed and continue whipping the cream) or use heavy cream the difference will be in the creaminess of the ice cream.

1. Using a small knife slit the vanilla pod lengthways. Pour the milk into a heavy based saucepan, add the vanilla pod and bring to the boil. Remove from heat and leave for 15 minutes to allow the flavours to infuse

Lift the vanilla pod up. Holding it over the pan, scrape the black seeds out of the pod with a small knife so that they fall back into the milk. SET the vanilla pod aside and bring the milk back to the boil.

2. Whisk the egg yolks, sugar and corn-flour in a bowl until the mixture is thick and foamy.

3. Gradually pour in the hot milk, whisking constantly. Return the mixture to the pan and cook over a gentle hear, stirring all the time.

4. When the custard thickens and is smooth, pour it back into the bowl. Cool it then chill.

5. By Hand: Whip the cream until it has thickened but still falls from a spoon. Fold it into the custard and pour into a plastic tub or similar freeze-proof container. Freeze for 6 hours or until firm enough to scoop, beating it twice (during the freezing process – to get smoother ice cream or else the ice cream will be icy and coarse)

Tuesday, February 24, 2009

Leftovers.. A PB&J Story.


I'm not going to include a recipe because I'm evil.

But I WILL tell what these are.

Magnolia's Vanilla Birthday Cake
with Smitten Kitchen's Peanut Butter Frosting and Neverbashfulwithbutter's grape frosting, which is not linkable anymore. BUT that is buttercream with grape jelly mixed in. :)

Superduper awesome.

Monday, February 23, 2009

Iron Cupcake Earth February - Coffee


I created a coffee themed cupcake by making a tiramisu cupcake! I used my favorite vanilla cupcake recipe and added all the glory that is tiramisu to it. YUM!

As an Iron Cupcake participant, I am competing for the following *fabulous* prizes:

February ETSY PRIZE-PACK is from artists:

* DIANAEVANS - as well as a pair of cupcake earrings from LOTS OF SPRINKLES.
* PLUS, IronCupcake:Earth can not forget our good friend, CAKESPY, who is now going to be doing a piece for our winner each month until further notice - sweet!

As an added bonus for February, SWEET CUPPIN CAKES BAKERY AND CUPCAKERY SUPPLY will be tossing in a variety of cupcaking supplies.

Last and certainly not least, don’t forget our corporate prize providers: HEAD CHEFS by FIESTA PRODUCTS, HELLO CUPCAKE by Karen Tack and Alan Richardson, JESSIE STEELE APRONS; TASTE OF HOME books; a t-shirt from UPWITHCUPCAKES.COM. Iron Cupcake:Earth is sponsored in part by 1-800-Flowers.

If you want to know more about Iron Cupcake:Earth, visit: http://ironcupcake.blogspot.com.


Sunday, January 25, 2009

German's Sweet Chocolate Cake

So I learned something tonight. "German Chocolate Cake" is actually "German's Chocolate Cake" due to a dude with the last name German creating the chocolate that goes into the cake. Sneaky!

Either way, it's Jeff's favorite kind of cake. Also it's the cake that was requested for cupcakes at work tomorrow. So I made them.


The recipe is from the German sweet chocolate box, I just made them into cupcakes. Basically I bake them for 15 minutes (my oven is so fast!) and then they are cupcakes instead of a big cake. Convenient! Yummy!

"German Chocolate Cake"
(Makes about 36 cupcakes! Insane!)

1 pkg. (4 oz.) BAKER'S GERMAN'S Sweet Chocolate
1/2 cup water
3/4 cup (1-1/2 sticks) butter or margarine
1-1/2 cups sugar
4 egg yolks
1 tsp. vanilla
2 cups flour, divided
1 tsp. baking soda
1/4 tsp. salt
1 cup buttermilk
4 egg whites

PREHEAT oven to 350°F. Microwave chocolate and water in large microwaveable bowl on HIGH 1.5 minutes, stirring at one minute. Stir when done. Add sugar; mix well. Add egg yolks, 1 at a time, beating on low speed of electric mixer after each addition until well blended. Add vanilla. Add 1/2 cup of the flour, the baking soda and salt; mix well. Add remaining 1-1/2 cups flour alternately with buttermilk, beating until well blended after each addition.

Whip egg whites until stiff. Fold into the cake mixture. Spoon into cupcake liners. Using dark pans may be the best, as the batter tends to "overfluff" the liners.

BAKE 15ish minutes, depending on your oven. Mine is fast. Cool in pan on wire rack.

Coconut-Pecan Frosting


4 egg yolks
1 can (12 oz.) evaporated milk
1-1/2 tsp. vanilla
1-1/2 cups sugar
3/4 cup (1-1/2 sticks) butter or margarine
1 pkg. (7 oz.) flaked Coconut (about 2-2/3 cups)
1-1/2 cups chopped Pecans

BEAT egg yolks, milk and vanilla in large saucepan with wire whisk until well blended. Add sugar and butter; cook on medium heat 12 min. or until thickened and golden brown, stirring constantly. Remove from heat.

ADD coconut and pecans; mix well. Cool to room temperature and of desired spreading consistency. I usually let mine sit about an hour before even trying to frost anything.

Sunday, January 18, 2009

January Iron Cupcake - Wine

Today I completed my very first baking challenge ever with Iron Cupcake: Earth. January's challenge is "Wine."

--------------

In doing so, I am competing to win the following prizes:

The January ETSY PRIZE-PACK is from artists:

* DOGBONE ART, as well as a pair of cupcake earrings from LOTS OF SPRINKLES.

* PLUS, IronCupcake:Earth can not forget our good friend, CAKESPY, who is now going to be doing a piece for our winner each month until further notice - sweet!

As an added bonus for January, our friend at SWEET CUPPIN CAKES BAKERY AND CUPCAKERY SUPPLY will be tossing in another treat as well.

Last and certainly not least, don’t forget our corporate prize providers: HEAD CHEFS by FIESTA PRODUCTS, HELLO CUPCAKE by Karen Tack and Alan Richardson, JESSIE STEELE APRONS, the CUPCAKE COURIER, TASTE OF HOME books. NEW, BEGINNING IN JANUARY; our new friends at UPWITHCUPCAKES.COM will be providing our winner with one of their cute cupcake attitude t's! Iron Cupcake:Earth is sponsored in part by 1-800-Flowers.

--------------

I did a lot of internet research before I decided what was not specifically a very popular or well-documented type of baking out there. From what I found, champagne cupcakes (or cake) is not that common or at least not well-documented. Unless someone is using cake mix. So, there we went.

They turned out BEAUTIFUL. Note, there WILL BE VOTING. So you should do that. Also if you're interested in Iron Cupcake: Earth, the link is at http://ironcupcake.blogspot.com.


Brut Rose Champagne Cupcakes


3 cups cake flour
½ tsp salt
1 tsp baking powder
½ tsp baking soda
2 sticks butter, softened
1 cup granulated sugar
¾ cup brut rose champagne
3 egg whites
½ cup sour cream
1 tsp vanilla

Preheat oven to 350 degrees. Combine dry ingredients in a separate bowl and set aside.

In a standing mixer, mix butter until soft. Add sugar and blend until fluffy. Add vanilla and sour cream. Mix on medium-low until blended. Alternate adding dry ingredients with the champagne until blended. If desired, add a teeny bit of pink food gel until you reach the desired color.

In a separate bowl, beat egg whites until soft peaks form. Fold into cake mixture until well-blended. Spoon into cupcake tins and bake 15-20 minutes. Cool.

Prepare champagne syrup while you wait.


Champagne Syrup


1 cup brut rose champagne
½ cup sugar
1 tsp vanilla

Bring champagne to a boil in a small saucepan. Once boiling add the sugar and vanilla, stirring until dissolved. Set aside to cool.

Once cupcakes and syrup have cooled, poke a fork into each cupcake about 4 times. With a basting brush, scoop the syrup and let it soak into each cupcake. Let sit for about 10 minutes.

Brut Rose Champagne Frosting

1 cup softened butter
4-6 cups powdered sugar
¼ cup heavy cream or milk
¼ cup brut rose champagne
2 teaspoons vanilla

Beat the butter until whipped. Add ½ cup of powdered sugar SLOWLY, let mix. Add another cup of powdered sugar. Add the vanilla. Add one-half the milk. Add 2 more cups of powdered sugar. Add one-half the champagne and let mix. Do not add the milk and champagne at the same time or your frosting may (and most likely will) curdle. This is super gross.

Add the rest of your powdered sugar. If the frosting needs more liquid, add the rest of the champagne. If more liquid is needed, you may use the rest of the milk but not until the champagne is well incorporated. Add any food coloring gel desired.

Frost the cupcakes! Decorate! Eat!

Thursday, January 1, 2009

Bacon, Gruyere, Olive Bread

So I found a recipe at Chef's Gone Wild for a bread-cake-thing that had many of my favorite things. Meaning olives and bacon. So I made it.

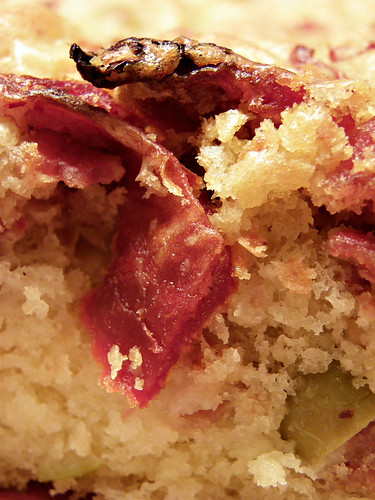
Interesting Bread

I also added roasted garlic to it, which I thought would be a reasonable addition. I'd actually never used sun-dried tomatoes before and I found them in the bulk bins at the store, which was CONVENIENT.

I like the "bread." It's more like a cake without sugar and then.. well. Non-cakey things in it. I think the next time, I would make it as mini-muffins. It's a bit crumbly. But DEFINITELY good.